0. Printing Module Design
Websocket Connection
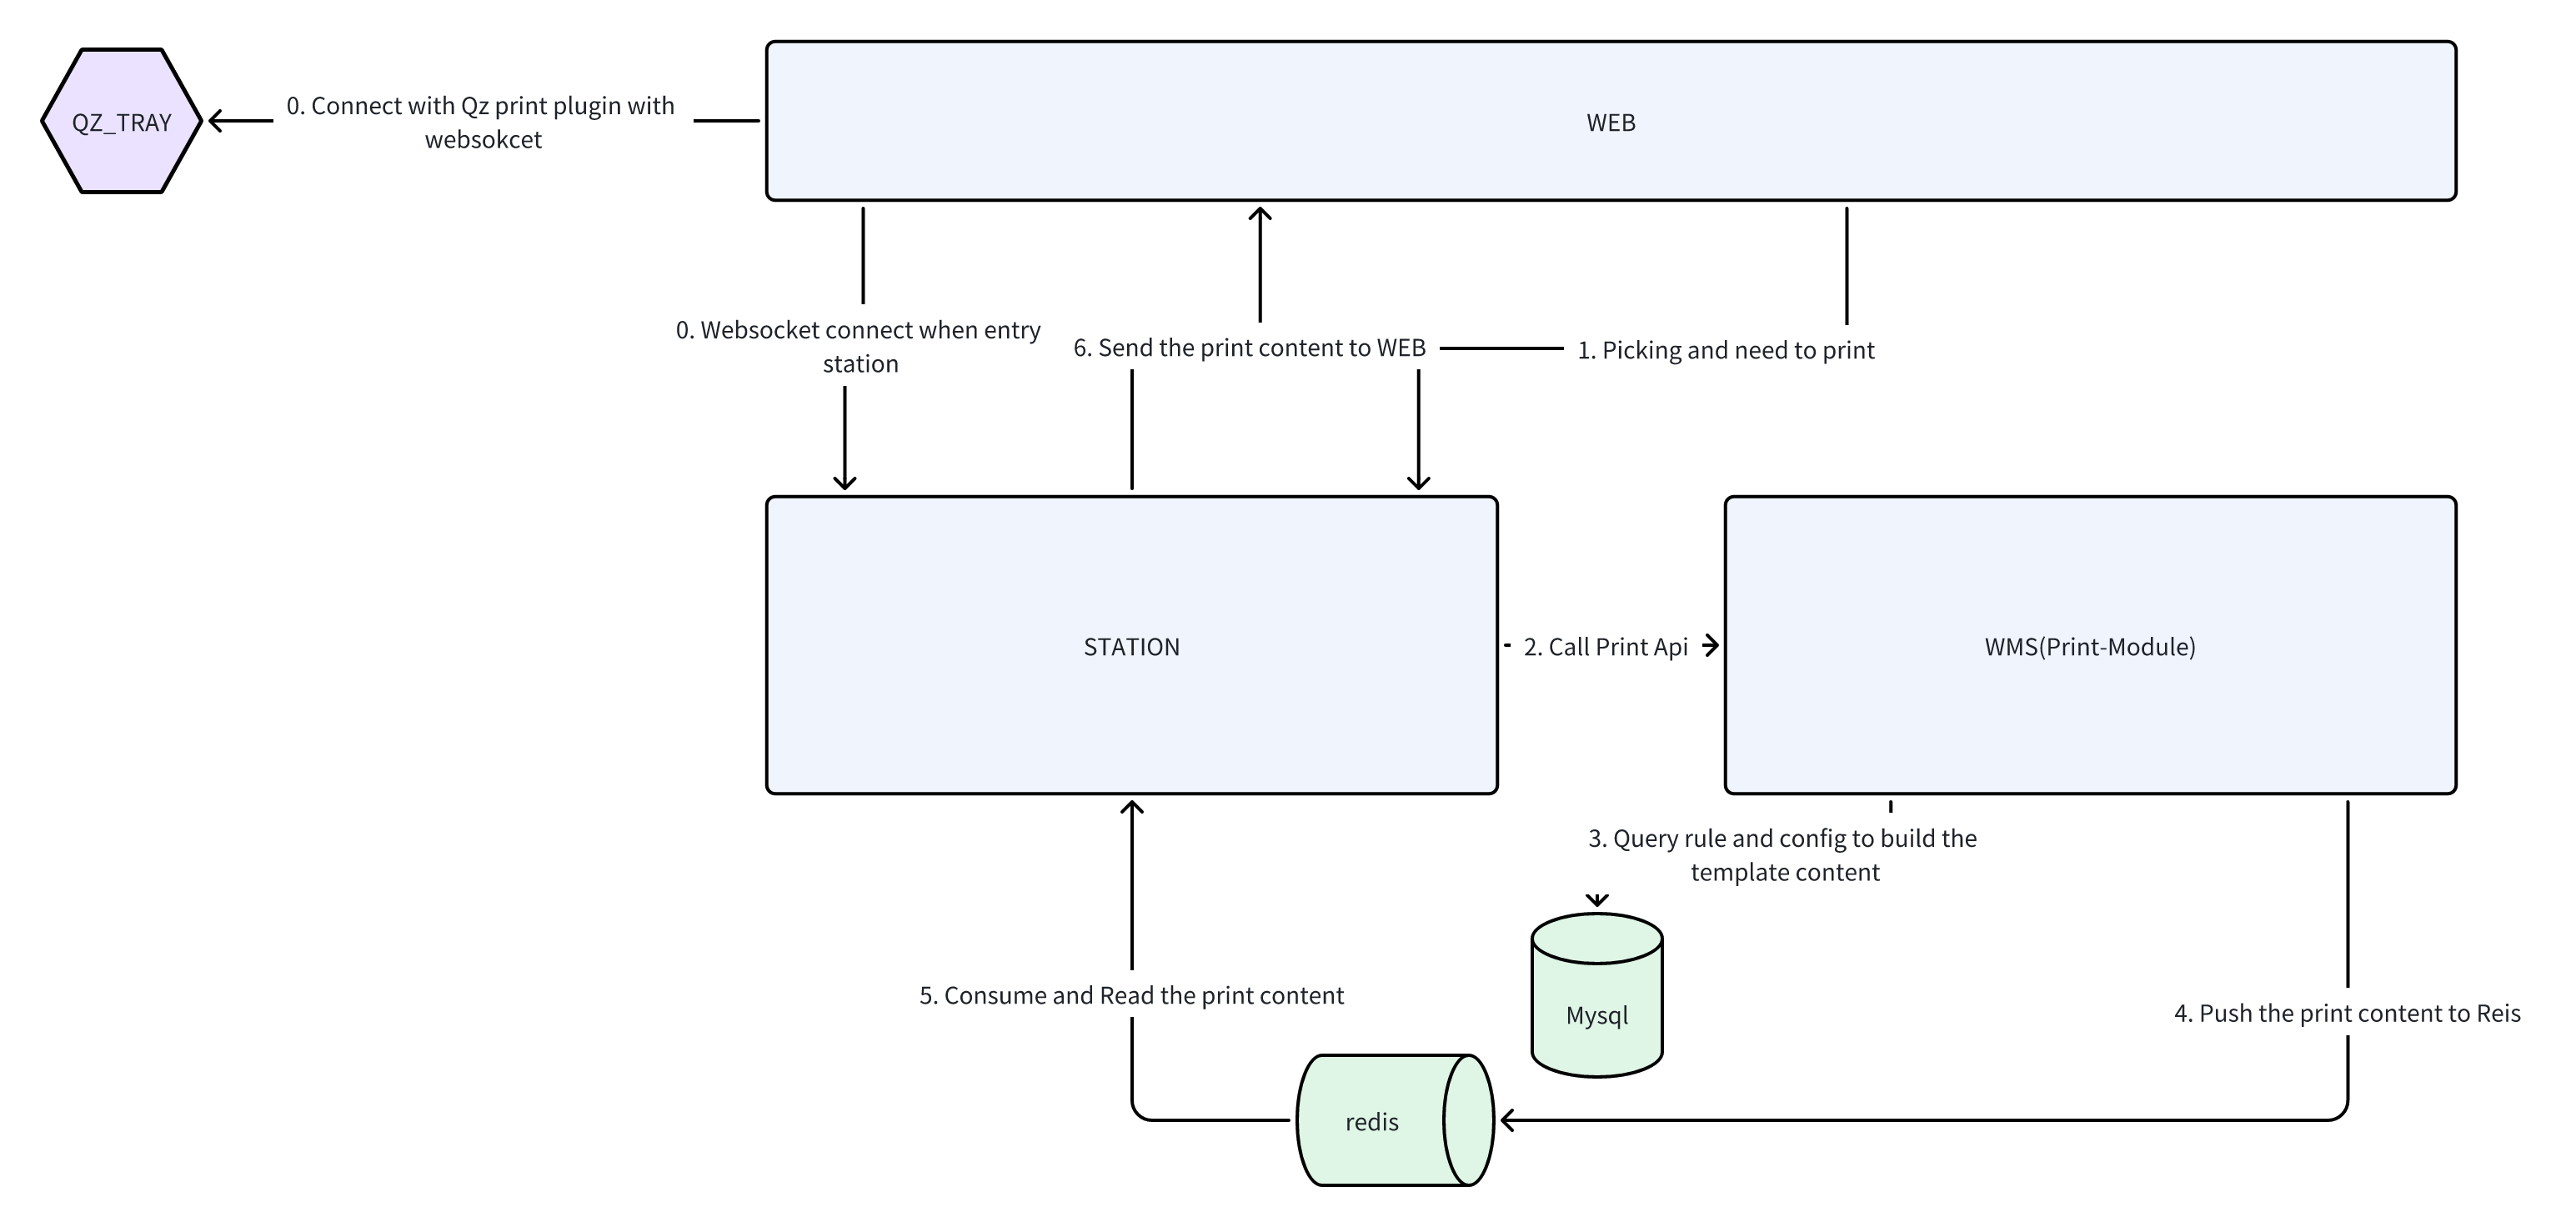
When users access the STATION site, the system establishes real-time connections via WebSocket:
- Connection with the WEB service (Label 0)
- WEB browser also connects with the QZ_TRAY printing plugin (Label O)
Triggering Print Requests
- Users trigger printing needs after completing picking operations at STATION (Label 1)
- The system then calls the printing API (Label 2)
Template Construction & Data Processing
- Upon receiving requests, the WMS printing module:
- Queries printing rules and configurations from MySQL database (Label 3)
- Dynamically generates printing template content based on rules
- Pushes content to Redis queue (Label 4)
Content Consumption & Transmission
- STATION consumes and reads printing content from Redis (Label 5)
- Sends content to WEB service (Label 6)
Printing Execution
WEB connects with the QZ_TRAY printing plugin via WebSocket, ultimately driving the printer output (Label O).
Process Characteristics
- Relies on MySQL for configuration storage and Redis for efficient content relay
- Maintains real-time communication via WebSocket to ensure immediate printing commands
- Clear module division (WMS handles logic processing, WEB handles communication relay)
QZ_Tray is a printing plugin for implementing printing functionality on Windows systems. https://qz.io/
1. System Login & Navigation
1.1 System Login
- Open browser and enter system URL
- Input username and password on login page
- Click "Login" button to enter system
1.2 Navigate to Printing Management
- After successful login, find "Configuration Center" > "Print Configuration" in left navigation bar
- Click to expand and select "Print Records"
- System will display the main printing task management page

2. Printing Configuration Process
2.1 Configuring Print Templates
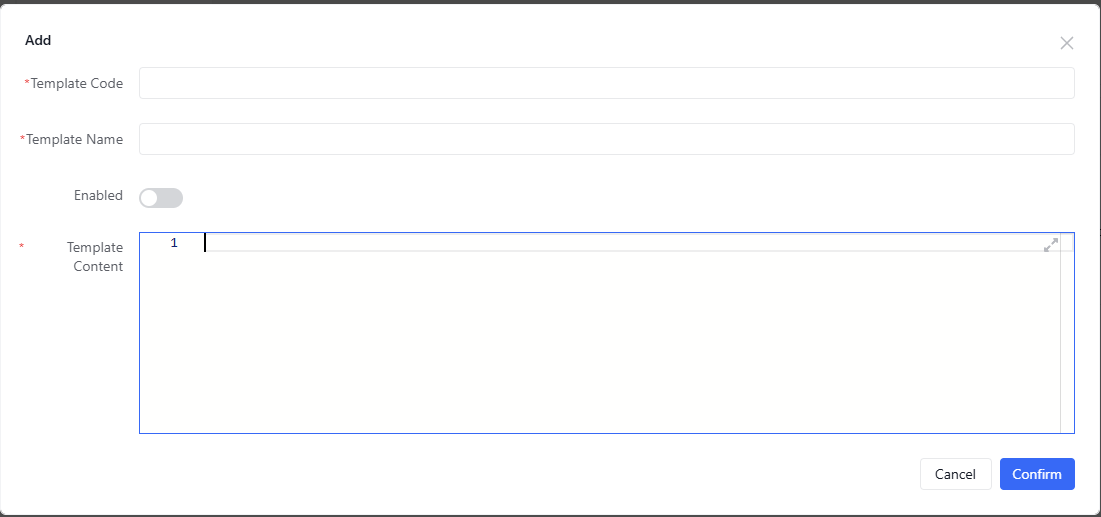
Create New Template
- Go to "Print Configuration" > "Print Templates"
- Click "Add" button
- Fill template information:
- Template Code: Unique identifier (e.g. "X3M")
- Template Name: Descriptive name (e.g. "Packaging Info Template")
- Template Content: HTML content
- Active Status: Check to enable
- Click "Save" to complete
2.2 Configuring Print Rules
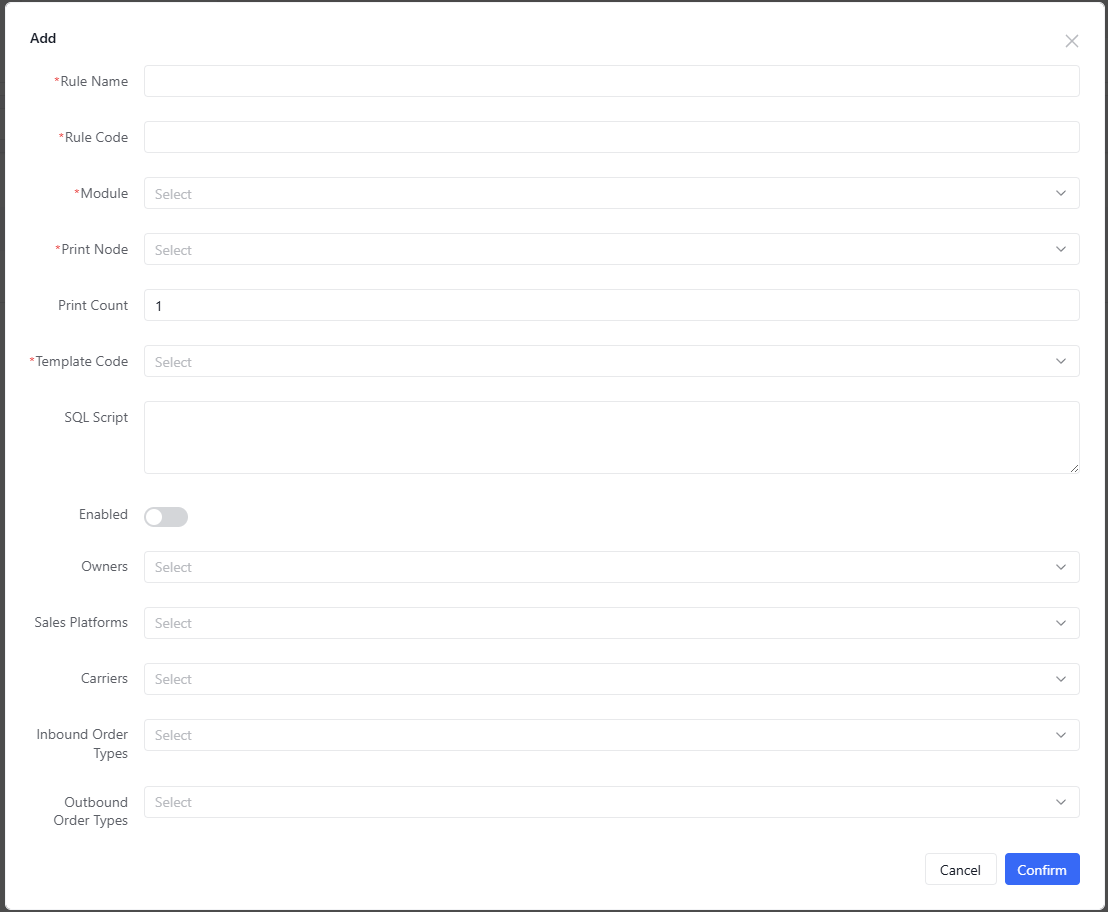
Create New Rule
-
Go to "Print Configuration" > "Print Rules"
-
Click "Add" button
-
Fill rule information:
Basic Info
- Rule Name: Descriptive name
- Rule Code: Unique identifier
- Module: Select business module
- Print Node: Select trigger timing
Condition Settings
- Owner Code (optional)
- Sales Platform (optional)
- Carrier Code (optional)
- Order Type (optional)
Print Settings
- Template Code: Select related template
- SQL Script: For querying print data (optional)
- Print Copies: Default quantity
-
Click "Save" to complete
2.3 Configuring Workstation Print Settings
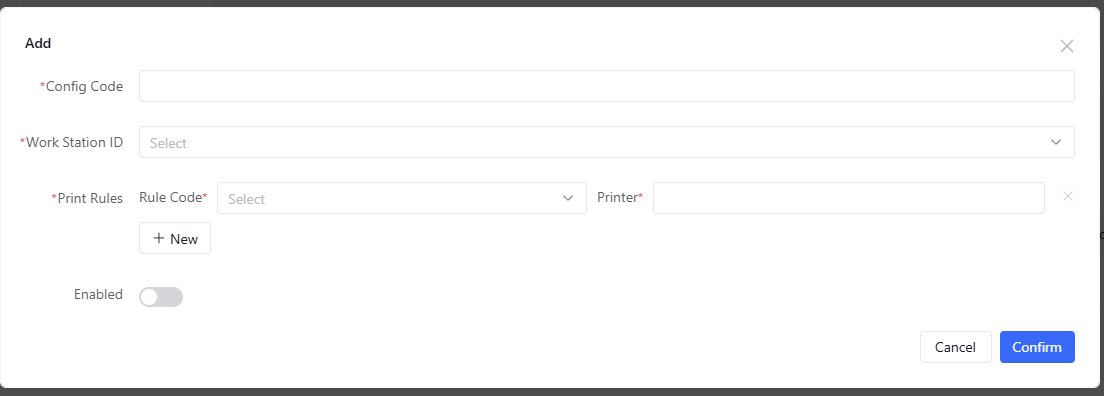
Create New Configuration
- Go to "Print Configuration" > "Print Settings"
- Click "Add" button
- Fill configuration:
- Config Code: Unique identifier
- Workstation ID: Target workstation
- Print Config Details:
- Add rules
- Specify printer
- Click "Save" to complete
3. Print Record Query
3.1 Basic Query
- Go to "Print Record Management"
- Set query conditions:
- Module (required)
- Print Node (required)
- Workstation ID (optional)
- Time Range (optional)
- Status (optional)
- Click "Search" to execute
3.2 Record Processing
- Successful Records: Display print details
- Failed Records:
- View error messages
- Click "Retry" button
- Export error reports
4. FAQ
Q1: Rules not working?
- Check rule status
- Verify related template status
- Confirm workstation configuration
- Check business data matching
Q2: Garbled printing?
- Check template encoding
- Verify printer driver
- Confirm font support
5. Notes
⚠️ Important
- Disable configurations before deletion
- Regularly check print records
- Permission control set by admin